Showing posts with label Tamara's Wardrobe. Show all posts

Sunday, May 30, 2010

Tamara's Spring Suit V1037

I want to thank all of you who left wonderful comments on my last post.You were right. The dress was just right for the occasion and I got lots of compliments!

Last week we went to Ottawa again (to see Riley of course) before going to Montreal.Before leaving I really pushed myself to make DD's suit.I didn't get all of it finished so I couldn't take nice pics of it on Antoinette.I did some hand sewing on the way and finished up when I got there.

The pattern is V1037


The fabric is this gorgeous silk tweed I purchased at C&M Textiles in Montreal.They were having an 80% off sale on end of bolts and I was lucky enough to score this piece and Tamara loved it too.


The only changes I made was bound buttonholes,


and I changed the bound pocket to a single lip to save time. It doesn't show anyway.


I used a skirt pattern that I had already made for Tamara so there wouldn't be any fit issues and I'm pleased to say the suit was a perfect fit!

Unfortunately,last week was so hot and muggy that I didn't have the heart to insist on a photo of Tamara in the suit so this is the only good photo I managed to take.


I hope you all had a great week! I can't resist leaving you with a favorite Riley picture.

Saturday, March 27, 2010

Tamara's Tote Bag

A few years ago ,I made Tamara a boucle coat and then decided to use the leftover fabric for a tote bag which I trimmed with a basket weave black vinyl. DD was thrilled with this accessory to her coat and said that she had people stop her on the street to ask where she had gotten her coat and bag.

Naturally,when I agreed to make her a new coat, she asked if I could make her a matching bag. Well,after about 10 hours of work,here it is.


It measures about 18' wide (including the sides) and 16" high.
I had just small scraps of the fabric left but did happen to have a meter of red vinyl so I decided to put the two together and after a lot of thought,sketching ,and planning,it finally came together.I may have gotten carried away with the number of pockets on this one!


I covered the boucle fabric with fusible vinyl to make it stronger and and used it on all the trim on the outside of the purse.
The side pocket on the above picture is for an umbrella. The front one is pleated at the sides to make it more accessible and has a magnetic closure.


This little pocket will work well for loonies and toonies (the Canadian $1.00 and $2.00 coins) or for keys.


I added a zipper closure ( I sewed the separating zipper to two strips of vinyl fused boucle,then sewed the strips to the facings of the purse.)


The straps are made of black faux leather from my stash.


The lining is a polyester silky that I was lucky enough to find on the bargain tables at Fabricville.I stabilized it with a heavy drapery interfacing.On one side are a cellphone pocket and another pocket which were both pleated on the sides to make them roomier.On the other side I sewed in a zippered pocket .


Here are the coat and bag together.I have to admit, I was sad to part with this bag but I know Tamara will really appreciate it.


So let me know what you think and if you're interested, I've posted Part 2 of my tips on making a coat (this time the inside) look professional on Diana's Sewing Lessons.

For more pics ,look here.

Happy Sewing and have a restful weekend everybody!

Saturday, March 20, 2010

Tamara's Coat.... Finished at Last

Well here it is at last...Tamara's coat! ( made from pattern S2764 ).I'm so very glad to not only be finished,but to love it as well! I'm satisfied with the end result and confident that it will fit Tamara.I'm always so nervous that what I make won't fit and that's probably silly because I have Antoinette dialed to her measurements, but there's always that possibility.


I really like the lay of the collar on this garment.
The buttons were from my stash and came from Frenchy's, a local second hand store where I find great buttons.


It just happens too, that the back of the coat fits me perfectly so I'll be making this coat for myself after a major FBA and I may just leave out the front and back pleats too.


I had originally planned on making bound buttonholes for it but to save time I used my new sewing machine which makes very good buttonholes (knock on wood).Having said that, the bound ones would have been more professional looking.

My only doubt is whether DD will like the sleeves.She may find them a bit wide.


Have a look at the red satin lining.Isn't it pretty? You'll notice the facings are not made out of the coat fabric. I didn't have enough so I used a suit-weight linen instead.


I used a polyester silky houndstooth to make bias for the piping between the facings and lining


and the Hong Kong finish at the bottom of the facing.


I attached the lining to the bottom of the coat with a thread chain at each seam.


Although the coat is too small for me through the chest, I thought I'd include a pic of me wearing it because,DD will probably never send me a photo of her wearing it. So here it is! Let me know what you think.


If you're interested, I've published a tutorial entitled How to make Your Coat Look More Professional on my other blog,Diana's Sewing Lessons.

Saturday, February 13, 2010

Tamara's Mini Winter Wardrobe -Part 2

Two more pieces are finished and I'll send off the four pieces to Tamara early in the week. The hounds tooth check spring coat will not be ready for another couple of weeks so I don't want to wait till then to send the other pieces.I want DD to be able to wear them now.

The white blouse ( S2501 ), was changed quite a bit. The tie became longer and the sleeves were made narrower with a wider cuff..(I just cut them from another shirt pattern.)I used the body of View A and the collar of View D.[This is one of Simplicity's patterns which have separate pieces for B,C,& D cups so I want to make one for myself].

The fabric is a white pincord cotton shirting which I really love but it's been in my stash for quite some time so my loss is Tamara's gain.As usual with natural fibers,this fabric was a joy to sew.It looks great on Antoinette and I'm sure will look great on DD.And I think it complements the plaid bias skirt quite well too.


Has anyone else out there made this dress S2473?,It's a great pattern!I think it's very Audrey Hepburn don't you?

This should be a nice addition to a work wardrobe for a young woman. I had originally intended to pair this dress with a Chanel-type jacket out of the black and white houndstooth check , but DD asked if I'd mind making her a coat instead. Well, I can't say no to any of my children, so of course I agreed. But then, the sleeveless dress didn't make as much sense anymore. I didn't have enough of this wool flannel to add sleeves so I got the idea that Tamara could wear it as a jumper with the white blouse or a black turtle neck sweater or a black cardigan,even.Hopefully she'll see it that way too.

The fabric again is wool flannel and of course was great to sew . I made the sleeveless and straight skirt variation. The only changes I made was to lower the neckline to accomodate the tie on the blouse.This photo shows how I lowered it.


And I lined the dress although the pattern didn't call for it but a piece like this must be lined.Since I didn't have any red lining on hand and had promised DD I'd use my stash as much as possible,I lined it in charcoal grey Bemberg but made fabric facings to make sure the lining wouldn't peak out. This is how I worked it out.

I sewed the lining and dress together with wrong sides facing each other.


Then I sewed the facings to the outside of the dress in the regular way.


I clean-finished the facings by sewing fusible interfacing to the right sides and turning them to the wrong side and pressing and fusing the two.


That might be too much information so I'll stop there except to say that I hand stitched the edges of the facings to the lining .I put a tutorial on understitching the facings and why it's important to do so here for sewers who are beginners.

This is what the inside of the dress looks like.


I attached the lining to the kick pleat and at each seam and not all around the hem of the dress.I had used a pretty lace hem binding and didn't want to hide it.


I had wanted to do hand picking for the top stitching but it would have taken too long and I have sore thumbs so instead ,I used this decorative stitch in regular black thread and I like the results.


So here it is and I truly hope it fits.


More pics here.

Happy Sewing from Diana

Sunday, February 7, 2010

Tamara's Mini Winter Wardrobe -Part 1

This week ,I managed to almost finish three of the five pieces I'm planning for my daughter. Of course I started with relatively easy pieces. Tonight I'm posting on a self-drafted (sort of) bias skirt and a sweater top made from V8597 View C. See my sidebar for the whole plan.

The skirt is the result of my pointing out that this certain skirt she often wore was beyond wearing. (She bought it at an Ann Taylor shop when she lived in Florida in 2001!) I forgot to take a pic before I cut it apart but oh my! It was way past it's prime.She asked if I could make an exact,exact replica for her. And I tried.

When I took the skirt apart, I saw that it was stretched out of shape so I looked through my patterns and found this Butterick pattern that ended up being almost identical in length and width so I used it to draft my new pattern.


I cut it to include 1&1/2" seams on the sides to make sewing the bias seams easier.


The technique I used to make this skirt ,I learned from Sandra Betzina. She used my fabric to cut out and sew this skirt to illustrate her method.


I'm putting a tutorial here if anyone wants to know the details.
So here it is and I hope DD likes it and that it fits.


As for the pullover top,The fabric is a lovely polyester sweater knit in a heathered purple. I don't know if DD likes purple but if she doesn't, she should.


I made a couple of changes to the pattern. For good or bad ,I decided not to double the cowl collar fearing it would be too thick. But the single layer wanted to roll upward so I decided to zigzag it to the neckline as you see here.


I sewed the collar from the inside of the neck with the right side of the collar against the wrong side of the sweater . That way the right side of the collar showed on the outside. Then,I folded the collar in two and zigzagged it to the neckline. It really doesn't show as much as the photo indicates.

The other change I made was to join the two parts of the sleeves together as I didn't want a seam on the front of the sleeves.At the top where they didn't join, I added a dart and this formed the shoulder and you wouldn't know that the sleeves weren't drafted that way.


For more pics ,look here.

I also made a white shirt but I haven't sewn on the buttons yet so I'll keep it for another time.

I hope you found time to sew this week or weekend.

Happy Sewing from Diana !

Sunday, August 16, 2009

Tamara's Mini Wardrobe,Summer,2009

Well, I worked for three weeks on these pieces and was a bundle of nerves wondering if Tamara would like them and if they would fit. To my amazement,I sent the parcel out (to Ottawa from New Brunswick) by regular post on Monday and she received them on Thursday.Not only that but each piece fit!!.She said it was like Christmas and was very excited and pleased with everything.

The first piece I made was the jacket from this pattern (Vogue 8232)


Originally, it was suppose to go with this royal blue dress from my last post.
But later, I decided to add sleeves to the dress. Well,DD can still wear the jacket and dress together if she wants.


I used cotton twill and made two changes to the pattern.
First I added one inch to the front so that I could add these pretty big blue button and buttonholes.


The second change was on the sleeves. This twill was not stiff but an adequate bottom weight fabric. Thus, the raglan sleeves tended to stick out. To tame this, I formed a pleat at the hem and added a button and this simple step solved the problem.


Here is the dress and the jacket together. What do you think?


The next piece I made was a top using this pattern.( By the way, Debbie Cook has the directions for making an FBA on this pattern here)Is it OK for me to post a link like this?


I had never made anything with a twist on it but I found it quite easy,especially since I used a rayon/lycra which was quite lightweight.I want to make DD a long sleeved dress with this pattern because she really likes the top.


Actually.I'm not crazy about rayon/lycra.It is a little too see-through and clingy for my taste.In Tamara's parcel,I included a white RTW cami to wear under her twist top.


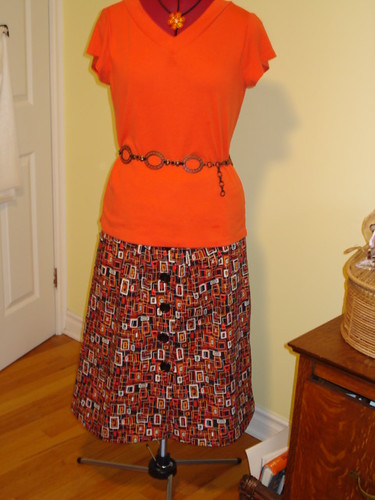
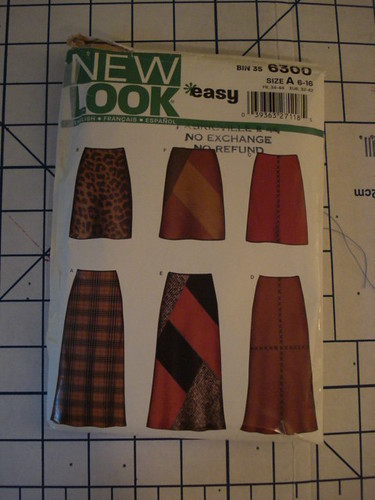
Next up was this skirt made from the same New Look pattern as this one I made for myself. DD chose this fabric so I was quite confident she'd be pleased with it. It's a light, stretchy, cotton poplin.


Instead of gathers on both front and back, I used pleats.


Here are the twist top and poplin skirt together.Tamara agrees that this style is slimming.


The last two pieces were made from a stretchy cotton denim I had in my stash, for DD to wear on casual Fridays.I decided to make the vest as an afterthought because I had a little of the fabric left over from the skirt.

I bought this pattern back in 1995 or so and had never made it.


The vest ended up being shorter than it showed on the pattern jacket so it's a little too short. Tamara agrees with me on that . However if she wears it with a shirt like this RTW T-shirt I picked up for her,tucked in , I think it's wearable..


The skirt is from this pattern (OOP) and is like this skirt. DD loved this one she said.

Well,this has been a long post. I hope you were able to stick it out to the end.I made up a folder of all the pieces if you want to have a look here

I hope you found time to sew this weekend.This week I'm making the jacket in this pattern as a store display.