Sunday, January 22, 2017

Sewing For A Good Cause


Wow! It's been a while and I'm starting to miss blogging so here goes.

Most of my sewing time throughout October and November was spent on making stuff to support our local Food Bank and Resource Center. Now , in January when the Food Banks are depleted because of Christmas, they need donations more than ever. I've decided to continue making the same project and selling them to help out as much as I can

What is this project you ask ?

I belong to a Bible Study Group and one day a member's daughter was visiting from Toronto. She was wearing this really cool wrap and graciously let me examine and measure it. Before long I had made many, many versions of what I'm calling the Five Way Wrap and quickly made $150 for the food Bank. I'll show you various versions on my dress form first and then give you some particulars.

z


This is a favorite and I think I'll keep it.It's an eyelash knit. and so fun and cozy!


This composite shows why I call my wrap the Four (or Five) Way Wrap.

Now for the specifics:

Each wrap requires about 1/2  to 2/3 meter of a drapey and preferably knit fabric but wovens will work..Various weights of fabric work and make each wrap unique.

A serger,though not a necessity, makes the sewing of this project much easier.
With a serger,you can make one in about a half hour including the cutting out.

Decorative threads for serging add a little extra something to the wrap.


A beautiful selvedge can be utilized.


And many different fabrics can be used although knits of course are preferable but I have used chiffon with good results.

Below,in order from left to right are as follows:

A crochet knit, a sweater knit, in the second row, a textured knit,a lace knit, a mesh knit,and in the third row, a boucle knit,a burnt out velvet and a ponte knit.


http://dianassewinglessons.blogspot.ca/2017/01/the-four-or-five-way-wrap.html

Reversible fabrics are a great choice as well.


Ok, this post was to inspire you to try one of these great wraps. For consruction details , please go to Diana's Sewing Lessons where I show how to make one.

Have fun. I know I've had a lot of pleasure creating these and please wish me luck at my sale which will take place in a couple of weeks.

In case you've missed me ( Lol ), I'll leave you with a pic or two of me wearing my wraps.


I keep making more wraps and finding new ways to make them special , so that keeps me from posting this. Just look at these !! On the right, I bound all the edges and really took my wrap up a notch. On the left, buttons down the seam add a sporty touch.


To give an idea how they look on.

And a few more shots.


I've never had a project that inspired me quite as much as this wrap. I am getting tired of it now though and will be glad to finish the seven I have left to make.

Thank you so much for stopping by and please tell me if you plan on trying one of these.

More later from



Saturday, December 24, 2016

Merry Christmas from Diana

I wanted to  let you know that I'm still here and will return to blogging very early in the New Year
and wish you all a peaceful Christmas season  filled with family, friends and good food. Oh and presents too !!

                                               Merry Christmas dear readers and fellow bloggers!


Saturday, November 5, 2016

A Designed by Diana Dress (With a Little Help From Burda)

Well, I've been away for quite a while I guess. I've been and still am very sick because of allergies symptoms which affect my respirator system. I thought once colder weather appeared, I'd feel better but I guess my immune system has been compromised . Even writing a post is almost overwhelming right now

 BUT!!!!! I've been able to sew all this time because my sewing room, which is in the basement of our house, has become my haven/prison. It's the only place where I'm not affected and where I get relief. Almost all of the sewing I did in October was for Good Will. and I did a lot of it. I'll show you next time .

A while back, I received  a  complimentary issue of both  My image and Be Trendy magazine and the company , Made By Oranges,  based in the Netherlands,  kindly offered a 25% discount to  any of my readers who wished to subscribe to either My Image or Be Trendy (the adorable children's version ).
Use discount code PASSIONISTA to get your 25% savings.
Each magazine includes 20 or so  patterns and include 3 pdfs (down loadable ) patterns. I'm in the process of using one of the patterns for dresses for Riley and Poppy. Very cute!!!

It took me about six weeks from beginning to end to make the dress I'm showing you today, working on it a little at a time and I love the results. I designed it myself with a little inspiration from the photo below. (not sure where it came from ) and with the help of this Burda pattern.


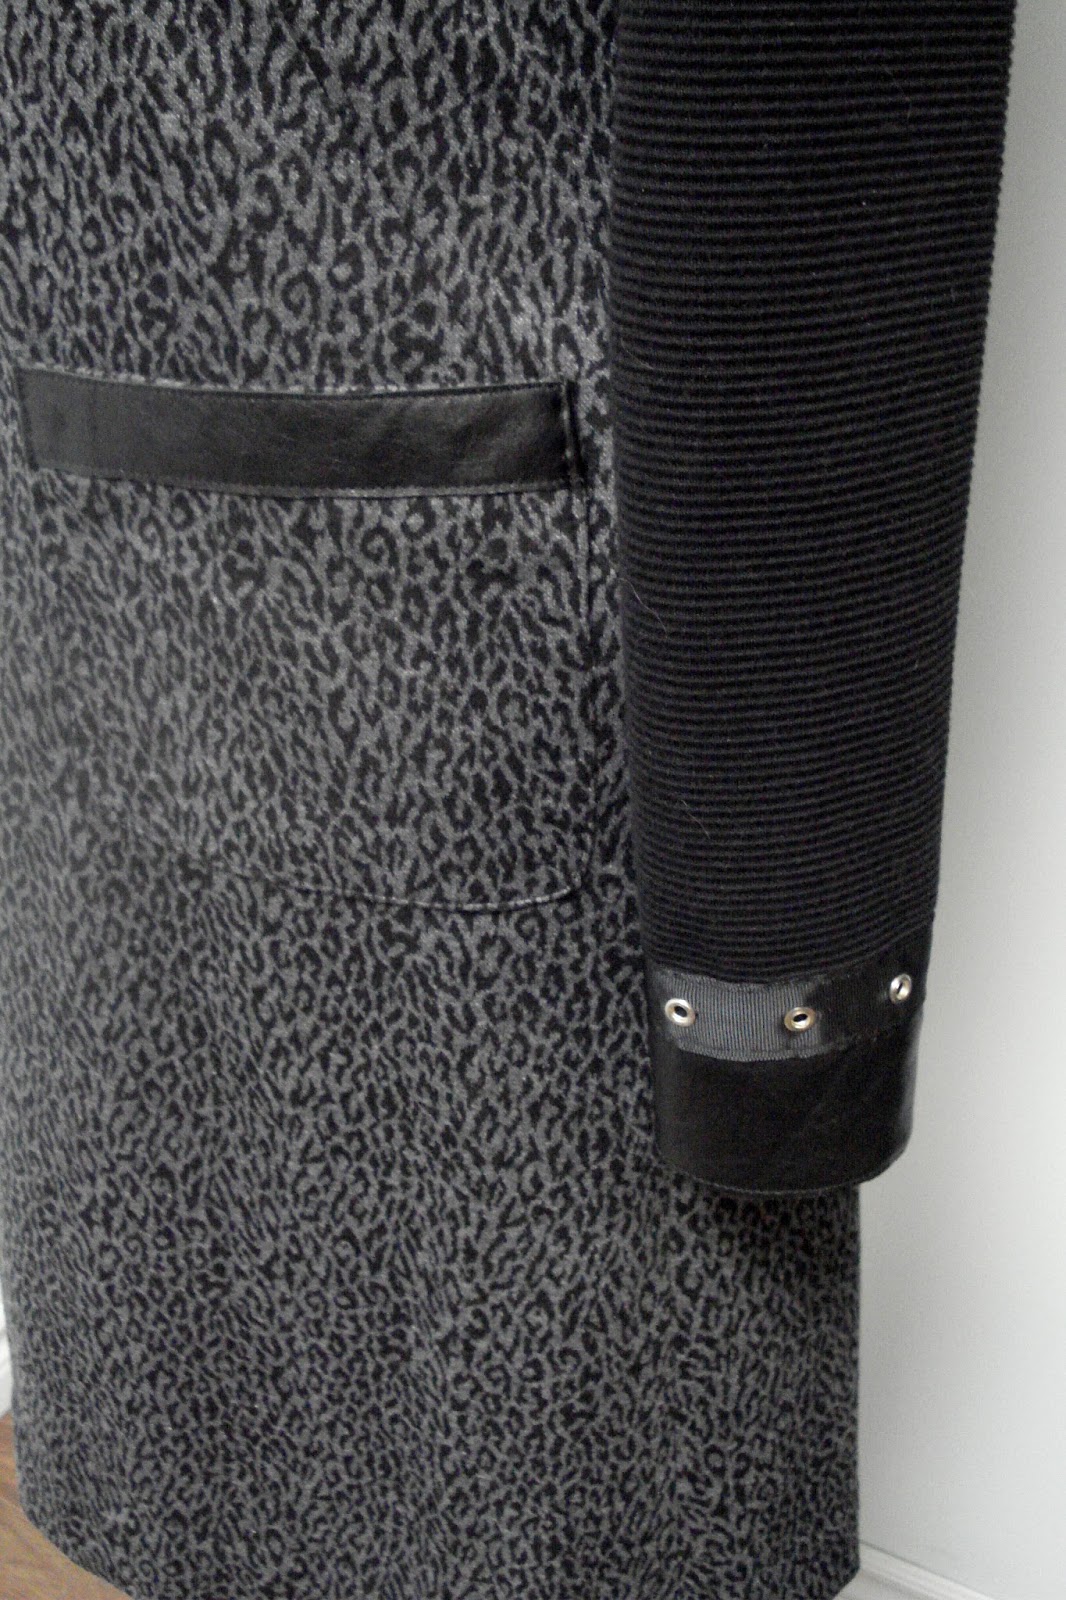
The fabric is a ponte print from my stash and bought at Fabricville with real leather accents cut from a Michael Kors skirt bought at Value Village. The grosgrain ribbon with grommets trim,  I bought on Rue Saint Hubert in Montreal a couple of years ago. And Voila!


A close-up of the leather and trim details. I applied the leather shoulder sections over the  fabric then the grommet trim overlapping the edge of the leather. Believe me my friends, I used a lot  of Wonder Tape for this project.

If yo not familiar with Wonder Tape, it's a wash away two way tape
that is very useful for placements when you're not sure where you want to place them because you can move the around before you decide.


I added leather trimmed patch pockets and repeated the shoulder details at the cuffs. For the sleeve I used  a poly ottoman from my stash because of it's dark black shade .


I added the same shoulder details in the back as well as an exposed zipper, a look  which I love.


For my dress I used my Burda sloper developed from Burda 6988. I changed the skirt to a slight A-line  shape for a change from the pencil skirt shape I most often use. I have to say that I'm very happy with the fit of this piece. It's as perfect as I'm ever going to achieve I think.

I wore my new dress to church Sunday and felt like a million dollars. I guess I felt so great to get out of the house. My husband said it was a shame to cover up the dress but I took off the coat at the restaurant afterward.


I'm very happy to finally get back to blogging. I'm still quite weak from my above mentioned allergy problems and I'm  a little worried I won't be able to go to Ottawa for my Riley's 7th birthday in two weeks and so is she!!!!

I hope it won't be as long before my next post. I want to share a special wrap I made and sold to make money for the Food Bank ( so far $150.00!!)

Happy sewing dear sewing friends from


Saturday, September 24, 2016

Sunburst Dart Top and Animal Print Skirt


Happy Fall Everyone! I do SO love fall, except for the new (for me) fall allergies. So not fun!

I finally got photos taken of the next part of the mini wardrobe I showed last time!

For the fourth piece I made with the light taupe rayon knit, I used my SFD bodice sloper. I moved the bust dart to the neckline and opened seven darts in a sunburst effect that I first read about in the Oct/Nov. 2006 issue of Vogue Patterns magazine,Here is the article


and here is my pattern piece. I guess I wouldn't need to have sliced my neckline in all those places. One opening would do the same thing. You measure the width of your bust dart and make your darts equal to that width. My dart is 3" so I made three darts (on each side ) 3/4' darts and one in the middle that was shared by both sides


I drew my outfit idea before  I started to cut out and sew . I find this really helpful when I'm designing my own pieces and drafting my own patterns .My idea was inspired by this Claire Underwood dress from Season 4 of House of Cards.


First the whole outfit


Here is the top which turned out really well and I love it.


Here I styled it with a self made necklace that I love.


The skirt was made using my SFD skirt sloper, I changed it to A line . For the skirt front I cut  two side panels and a center panel . I then cut the side panels to form a rather low set pocket  with a pocket band ..

And here is the skirt.


I sewed buttons on the pocket bands to highlight  the pockets. I sewed an exposed zipper to the back which I love.


The skirt fabric is stretch cotton poplin.

My husband snapped the photos just before I left for a retired teachers' meeting. .


I forgot to get one with the long cardi over it!

Well, I have two more outfits to show you where I experimented  moving the  bust dart . I'm quite over that  now and am anxious to sew something more important. like maybe finishing a moto jacket I started two years ago.

Until next time,


Saturday, September 10, 2016

A Special Outfit for a Special Occasion

My husband has reached a milestone birthday and I decided to simplify the celebration by hosting a dinner party for our family at a favorite restaurant. Expensive but oh so much easier than hosting yet another family get together at home !!

I admit the summer has left me tired out . Bob and I are back to our quiet life and watching lots of Netflix . Of course I'm never too tired to sew so there's been a lot of that going on.

I could have worn my reunion dress for the birthday party but I had one more outfit I wanted to make which would serve as a transition between summer and fall. It turned out to be  perfect for an occasion like this so I wore  it instead.

I 've lauded Fabricville's Milano collection of rayon jersey several times already so I'll spare you but when the 3 for 1 sale started, I bought a lot of my favorite knit . Actually, I bought the light taupe twice by mistake and so as I sewed , I kept thinking of other pieces I could make ,I ended up with four things. It was a very organized way of sewing because I didn't have to change the serger thread and I waited until all four pieces were finished before I hemmed them on my Janome Coverstitch Pro 2000 which I bought in the spring.

Here was my plan using Sally Surefit. I find this process so helpful when I don't know what to make with a certain fabric or when I'm feeling overwhelmed by my fabric stash. I don't always stick to the plan but it at least gets me started.


The first outfit didn't photograph well on the dress form. It looks much better on me and that doesn't often happen. As you can see, I didn't exactly stick to the plan.


The tunic was made using an old  and now OOP pattern


and the ankle pant with elasticized hem were  a modified version of my palazzo pant drafted from the Silhouette Yoga Pant #3400.

I love the extended shoulder and neckline of the Burda pattern. I added side slits for a little interest


It was when I had finished these two pieces that I discovered I had bought this fabric twice and I was delighted because the outfit just screamed for a long topper to wear over it.  I went to my revised version of McCall's 6844 which I've made many times because I love the simple lines of this cardigan.


I added these draped pockets from another pattern for a little visual interest.


I used my Cover Stitch to sew down the facings ( with a little help from Wonder Tape ) and my outfit was complete


I admit I was getting tired of this colour by now but I made one more piece which I'll keep for next time.

I would love to have gotten action shots at the party but that didn't happen but my DH snapped these pics just before we left. Oh and my husband  sisters loved this outfit!


And I'll leave you with a shot  I took of our deck  to check the lighting and the lovely peaceful  view we get to enjoy every day . It's so pretty I thought I'd include it.


Thank you so much for stopping by. I really appreciate your comments. They keep me wanting to blog when I get tempted to quit.

Happy Sewing from


Tuesday, September 6, 2016

Sewing in Outfits, (continued)

Sometimes, it makes sense to make two, three or even four piece outfits, as I did a couple of weeks ago. One reason is fabrics that coordinate but also when you know it will be hard to find anything to match exactly a certain colour such as this royal blue scuba knit  of the slim ankle pants and the  matching ponte coordinating prints of the tops and skirt..

The pattern I used for the  top is V8497, View B but lengthened by a few inches.


The pants are are slimmed down version of Silhouette Three Piece Yoga Pant ( #3000 ). I turned up the hem to form a cuff to make these just a little different.


I had a lot of fun creating as I sewed with the matching prints for this one.

.


The trim is actually a stripe  wrapped around the edges at the front and back and  the neck and sleeve cuff. I trimmed close to the edges and I love the results. Just a little bit of the white shows.


(The colour is really off in this pic!!!)


These two pieces are really fun together and I've loved wearing them a few of times this summer.


Ahh...these lazy days of late summer are so precious! I love everything about them.

The other pieces will have to wait for another time. I hope you've had a lovely summer, as I did .
Now on to fall sewing.

More later from